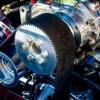
How to Clean a Lawn Mower Carburetor
Performing lawn mower maintenance entails more than changing the oil, cleaning the air filter, and sharpening the blades. Often the first time using your lawn mower after storing it over the winter months leads to hard starting, rough idling, or stalling under a load. Any fuel left in your lawn mower carburetor while in storage evaporated, leaving behind a sticky, varnish-like sludge that gums up the intricate passageways inside.
Does your lawn mower carburetor need cleaning?
Before you take your lawn mower apart and begin deep cleaning its components, it’s a good idea to verify that the issues you’re having with your lawn mower stem from a dirty carburetor.
For instance, a mower that fails to start at the beginning of the mowing season could be out of fuel or have the fuel shut-off valve in the off position, and rough idling and exhaust smoke could result from tipping the mower on its side while sharpening the blade.
Ultimately, performing annual maintenance, such as cleaning or replacing the air filter, changing the spark plug, and cleaning the mower’s outside and undercarriage (if not done when winterizing before storage) before tearing apart the carburetor is a good idea.
What you need to clean your lawn mower’s carburetor
Once you’ve exhausted other possible causes with less complicated solutions, it’s time to prepare a clean, well-lit workspace, preferably in a garage or other well-ventilated area. You also need to have some tools to remove, disassemble, and clean a lawn mower carburetor. An article from Bob Vila provides this list of necessary tools:
- Screwdrivers – 3/16” and 1/4” Flat head and #1 and #2 Phillips head
- Nut driver set
- Needle-nose pliers
- Socket wrench set
- Lawn mower carburetor cleaner (spray and liquid)
- Rubber gloves compatible with the above cleaner
- Small bucket (an old plastic food container will work)
- Compressed air (to blow cleaner and water out of carburetor passages)
- Safety goggles
How to clean your lawn mower’s carburetor
Before removing any parts, ensure that the carburetor and the area around it are free from dirt, grass clippings, and other gunk. Removing the carburetor opens a direct path into the engine’s valves and cylinder. You don’t want to drop any crud in there when removing the carburetor.
Next, remove the air filter and its housing and set it aside with the bolts, screws, or clips that held it in place. Once the air filter is out of the way, clean any previously inaccessible areas and take a few pictures or notes, paying particular attention to any connected hoses, small linkage assemblies, and how they connect at both ends.
Wearing your gloves and safety goggles, spray the carburetor’s outside and inside with cleaner to wash off more gunk before removing it. Ensure the fuel tank is empty or the fuel valve is off before removing the fuel line from the carburetor. You can test your mower’s fuel delivery by placing the open end of the fuel line in a bucket and running a small amount of fuel through it. If it’s plugged, address that and try running your mower again to see if that was the problem.
If your mower still doesn’t run as it should, it’s time to remove the carburetor. Start by taking off any rubber hoses taking care not to damage them. If they crumble or tear, you’ll have to replace them. Sometimes removing the linkages is easier after separating the carburetor from the engine block.
Typically, two small nuts (7/16” or 1/2”) hold the carburetor to the engine studs, but this will vary depending on the model. Use a deep socket to remove these and ensure the carburetor is free of all attachments, including its mounting gasket, as you remove it. Next, place the carburetor in a bucket to drain, rolling it around to various positions to remove as much fuel/cleaner as possible.
Place the carburetor on your workstation and remove the nut holding the fuel bowl to the bottom of the carb. Note that anytime during this process you see any gunk wipe it clean with a rag or blast it off with carburetor cleaner. Removing the fuel bowl could release about an ounce of fuel if it did not drain out in the bucket earlier.
The fuel float is attached to a needle via a hinge pin inside the bowl. Take note of the orientation of these parts before proceeding, as you’ll have to reinstall them in a few minutes. Push the hinge pin out with a small wire or grasp the end with needle-nose pliers and pull it out.
Now lift the float from the carburetor and remove the needle with needle-nose pliers. Shake the float and listen for any liquid inside or dry it with compressed air and watch for wet spots to appear as you proceed. Any sign of liquid inside the float means you should replace it.

Inspect the needle. The needle should have a smooth point made of metal or rubber. The point mates into a seat inside the carburetor that shuts off fuel when the float indicates the fuel bowl is full. A leaking float or worn needle lets fuel constantly flow into the bowl, causing the engine to “flood” and leak fuel onto the floor or ground. Replace any parts or gaskets showing signs of wear.
Soak the carburetor body and the disassembled parts in enough carburetor cleaner to cover them for a few minutes, then rinse with water. Make sure you keep track of the small pieces and blow the carburetor body dry with compressed air focusing on any tiny passages and hidden areas. Now it’s time for reassembly. Did you take good notes?
Again, inspect all the parts and gaskets for wear and tear and ensure all the parts and carburetor body are clean and dry. There’s no sense in doing all of this halfway. Next, reassemble the carburetor by reversing the disassembly process and referring to your notes and pictures. If you’ve replaced the float, follow its instructions to ensure you have the proper level.
After reassembling the carb, remount it to the mower, reattaching the linkages, hoses, and air filter. Then fill the tank with fresh fuel and fire it up. With a new spark plug, clean air filter, and refreshed carb, the mower should start right up. If not, it may be time to seek professional help.
Can you clean a lawn mower carburetor without taking it apart?
There’s no question that the best way to clean your lawn mower carburetor thoroughly is to take it apart. But there are products designed to clean your fuel system without taking anything apart. Some products mix with gasoline and operate like normal, while others spray directly into the air intake with the air filter removed. Depending on your carburetor’s level of blockage, one of these less invasive methods may fix your mower’s issue.